Sales Flow
Cashiers taking orders before payment.
Before you start
- You are signed in successfully
- You are on
Orderingpage - Menu data is already loaded
Steps
- Dine-In order
- Takeaway order
- Tap
Dine-In. - Tap the target table tile.
- Add items and required modifiers.
- Confirm items appear in the order list.
- Tap
Sendor tapCheckout.
- Tap
Takeaway. - Open the target takeaway order.
- Add items and required modifiers.
- Confirm items appear in the order list.
- Tap
Sendor tapCheckout.
If you need the customer name or phone number on takeaway printouts, use Order Contact from the function menu. See Function guide.
What you should see


- Quantity and line totals update after each item selection
SendandCheckoutactions are available- Item names follow your current language and item-name mapping (
Main/Alt) fromSettings - If the item has linked modifier groups and HQ has
Auto-show modifier groups on POSon for that item, the modifier selection opens immediately after you add the item - If the item has linked meal-set groups, the meal-set selection opens so staff can choose the required combo items
- On takeaway orders, saved customer contact details appear under the order header
Needed file: client/cl-41-order-item-name-language-mapping.png
Table screen view toggle
When Floor Plan Mode is enabled in Settings, Dine-In table screen now has a round toggle button at the lower-right area:
- Grid icon: switch to
Table List - Map icon: switch to
Floor Plan
This lets staff switch layout quickly without leaving the ordering flow.
Needed file: client/cl-37-ordering-table-view-toggle-floorplan-tablelist.png
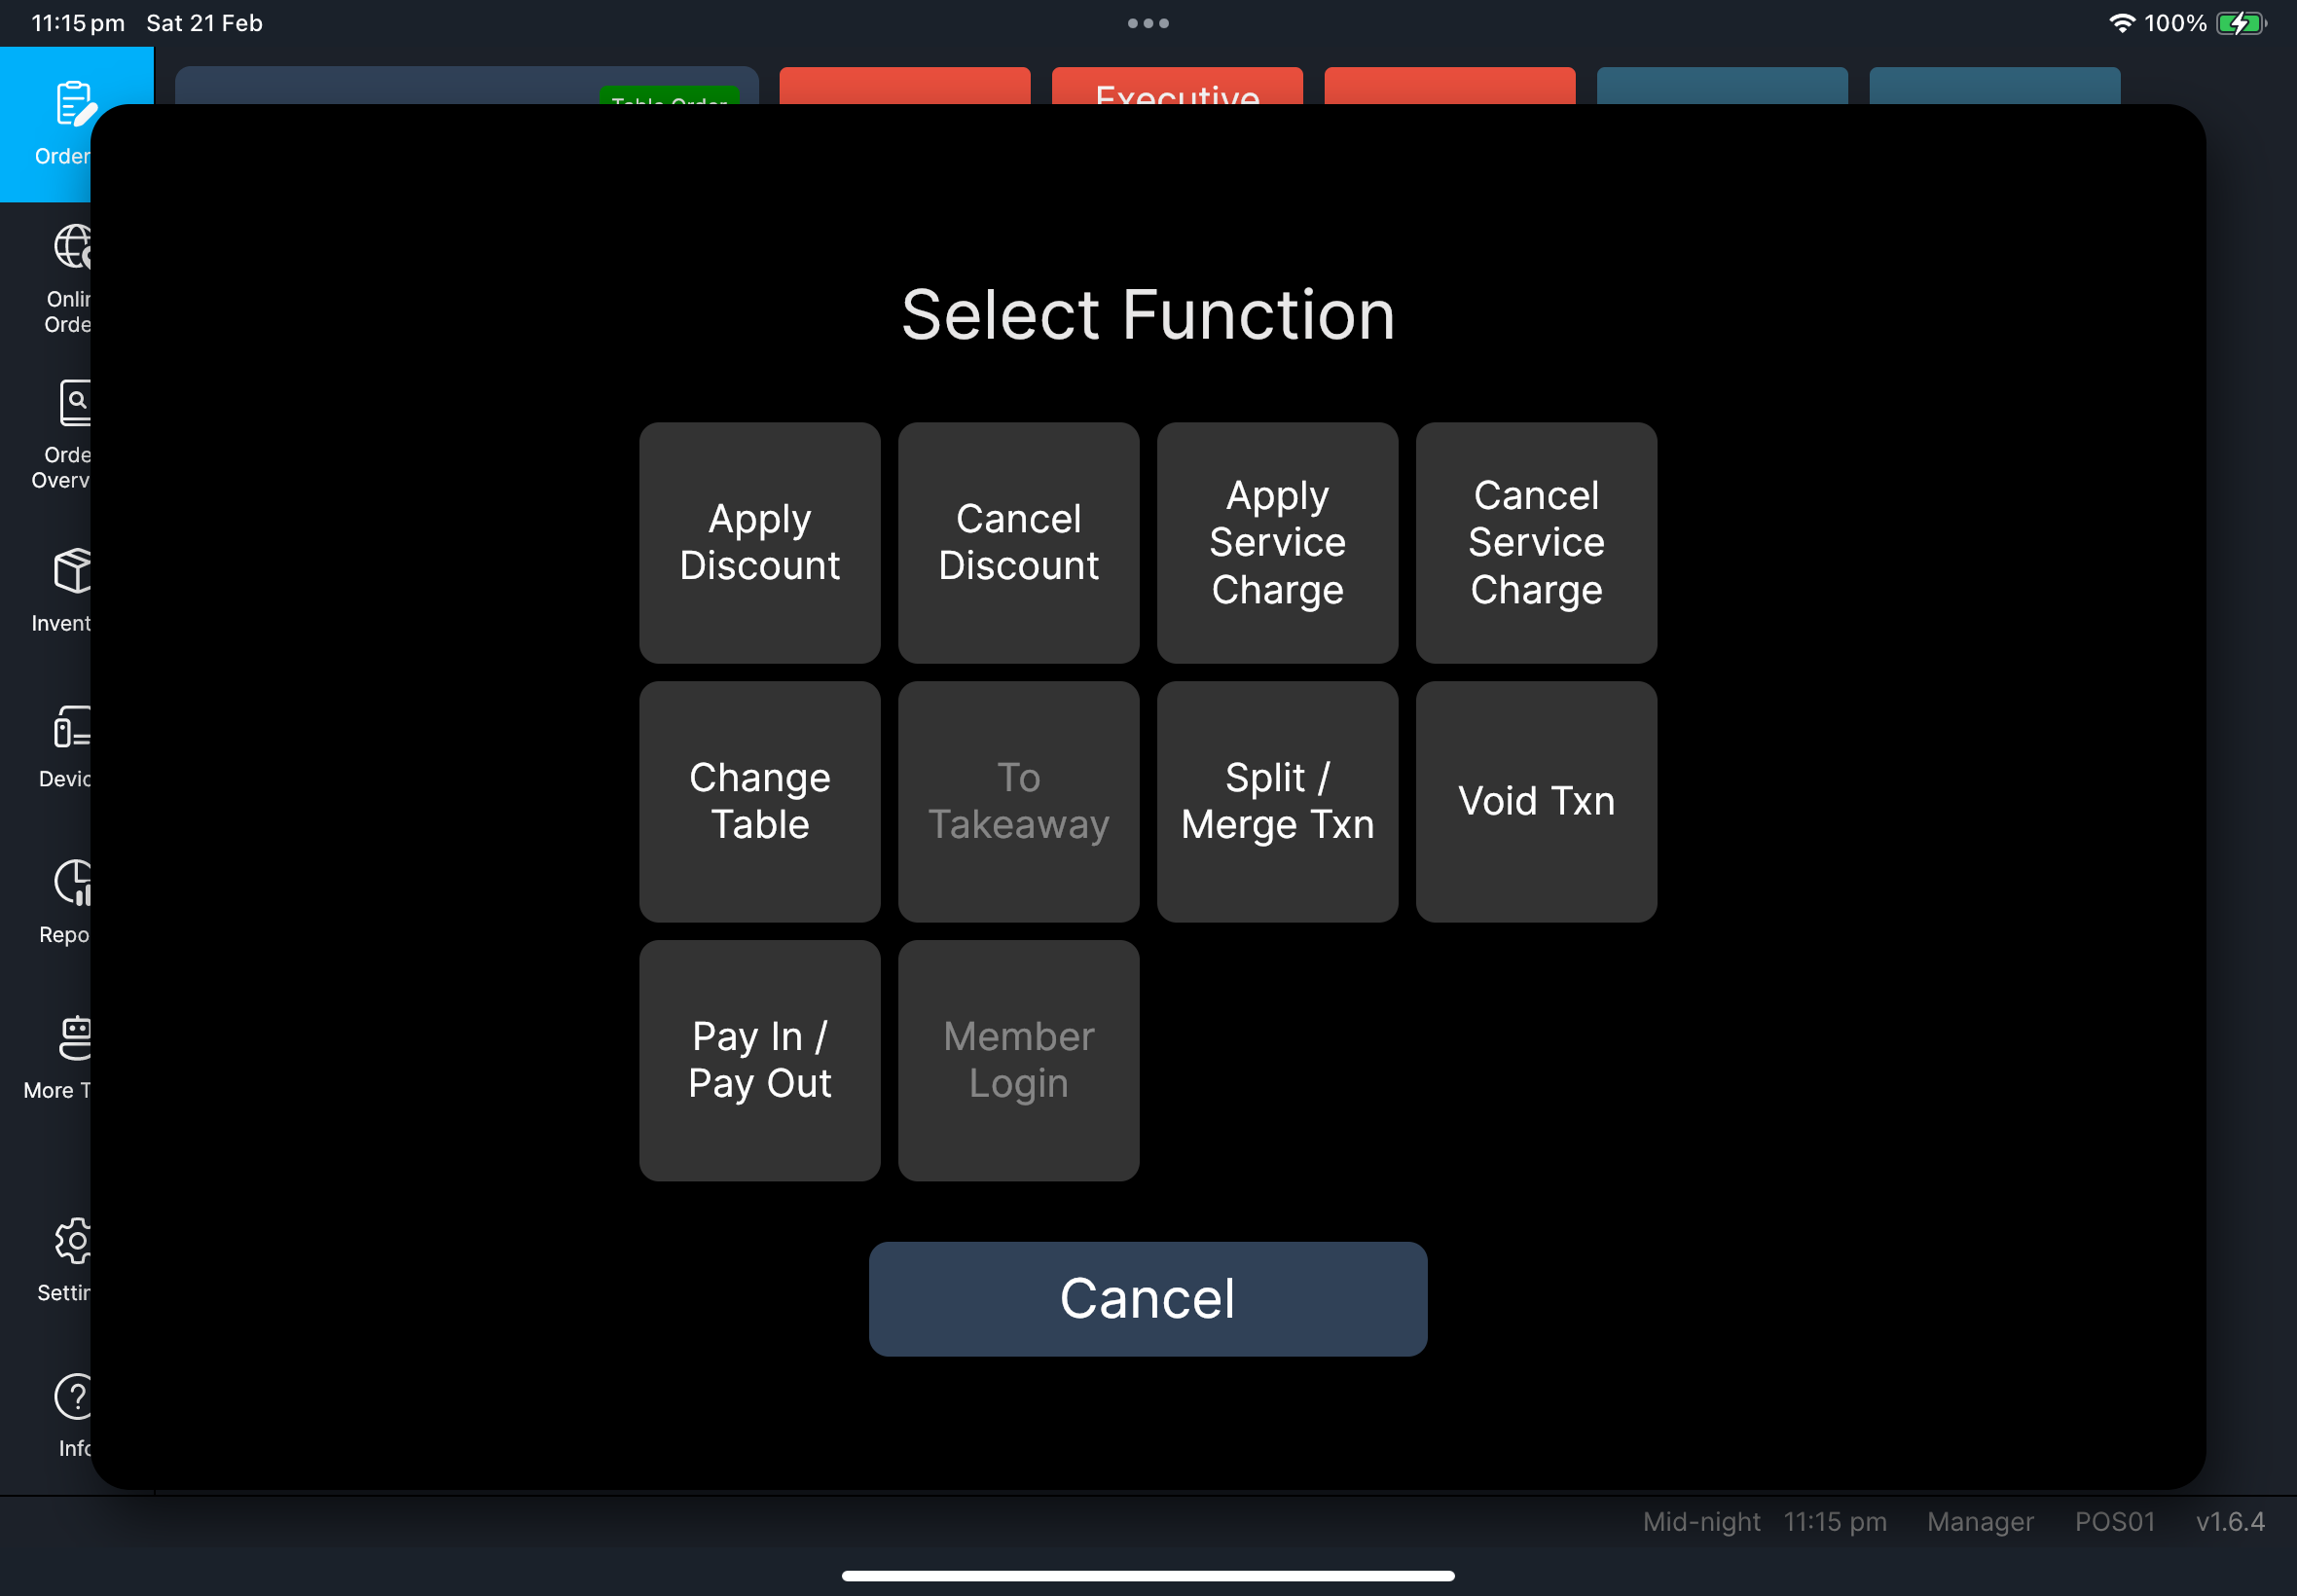
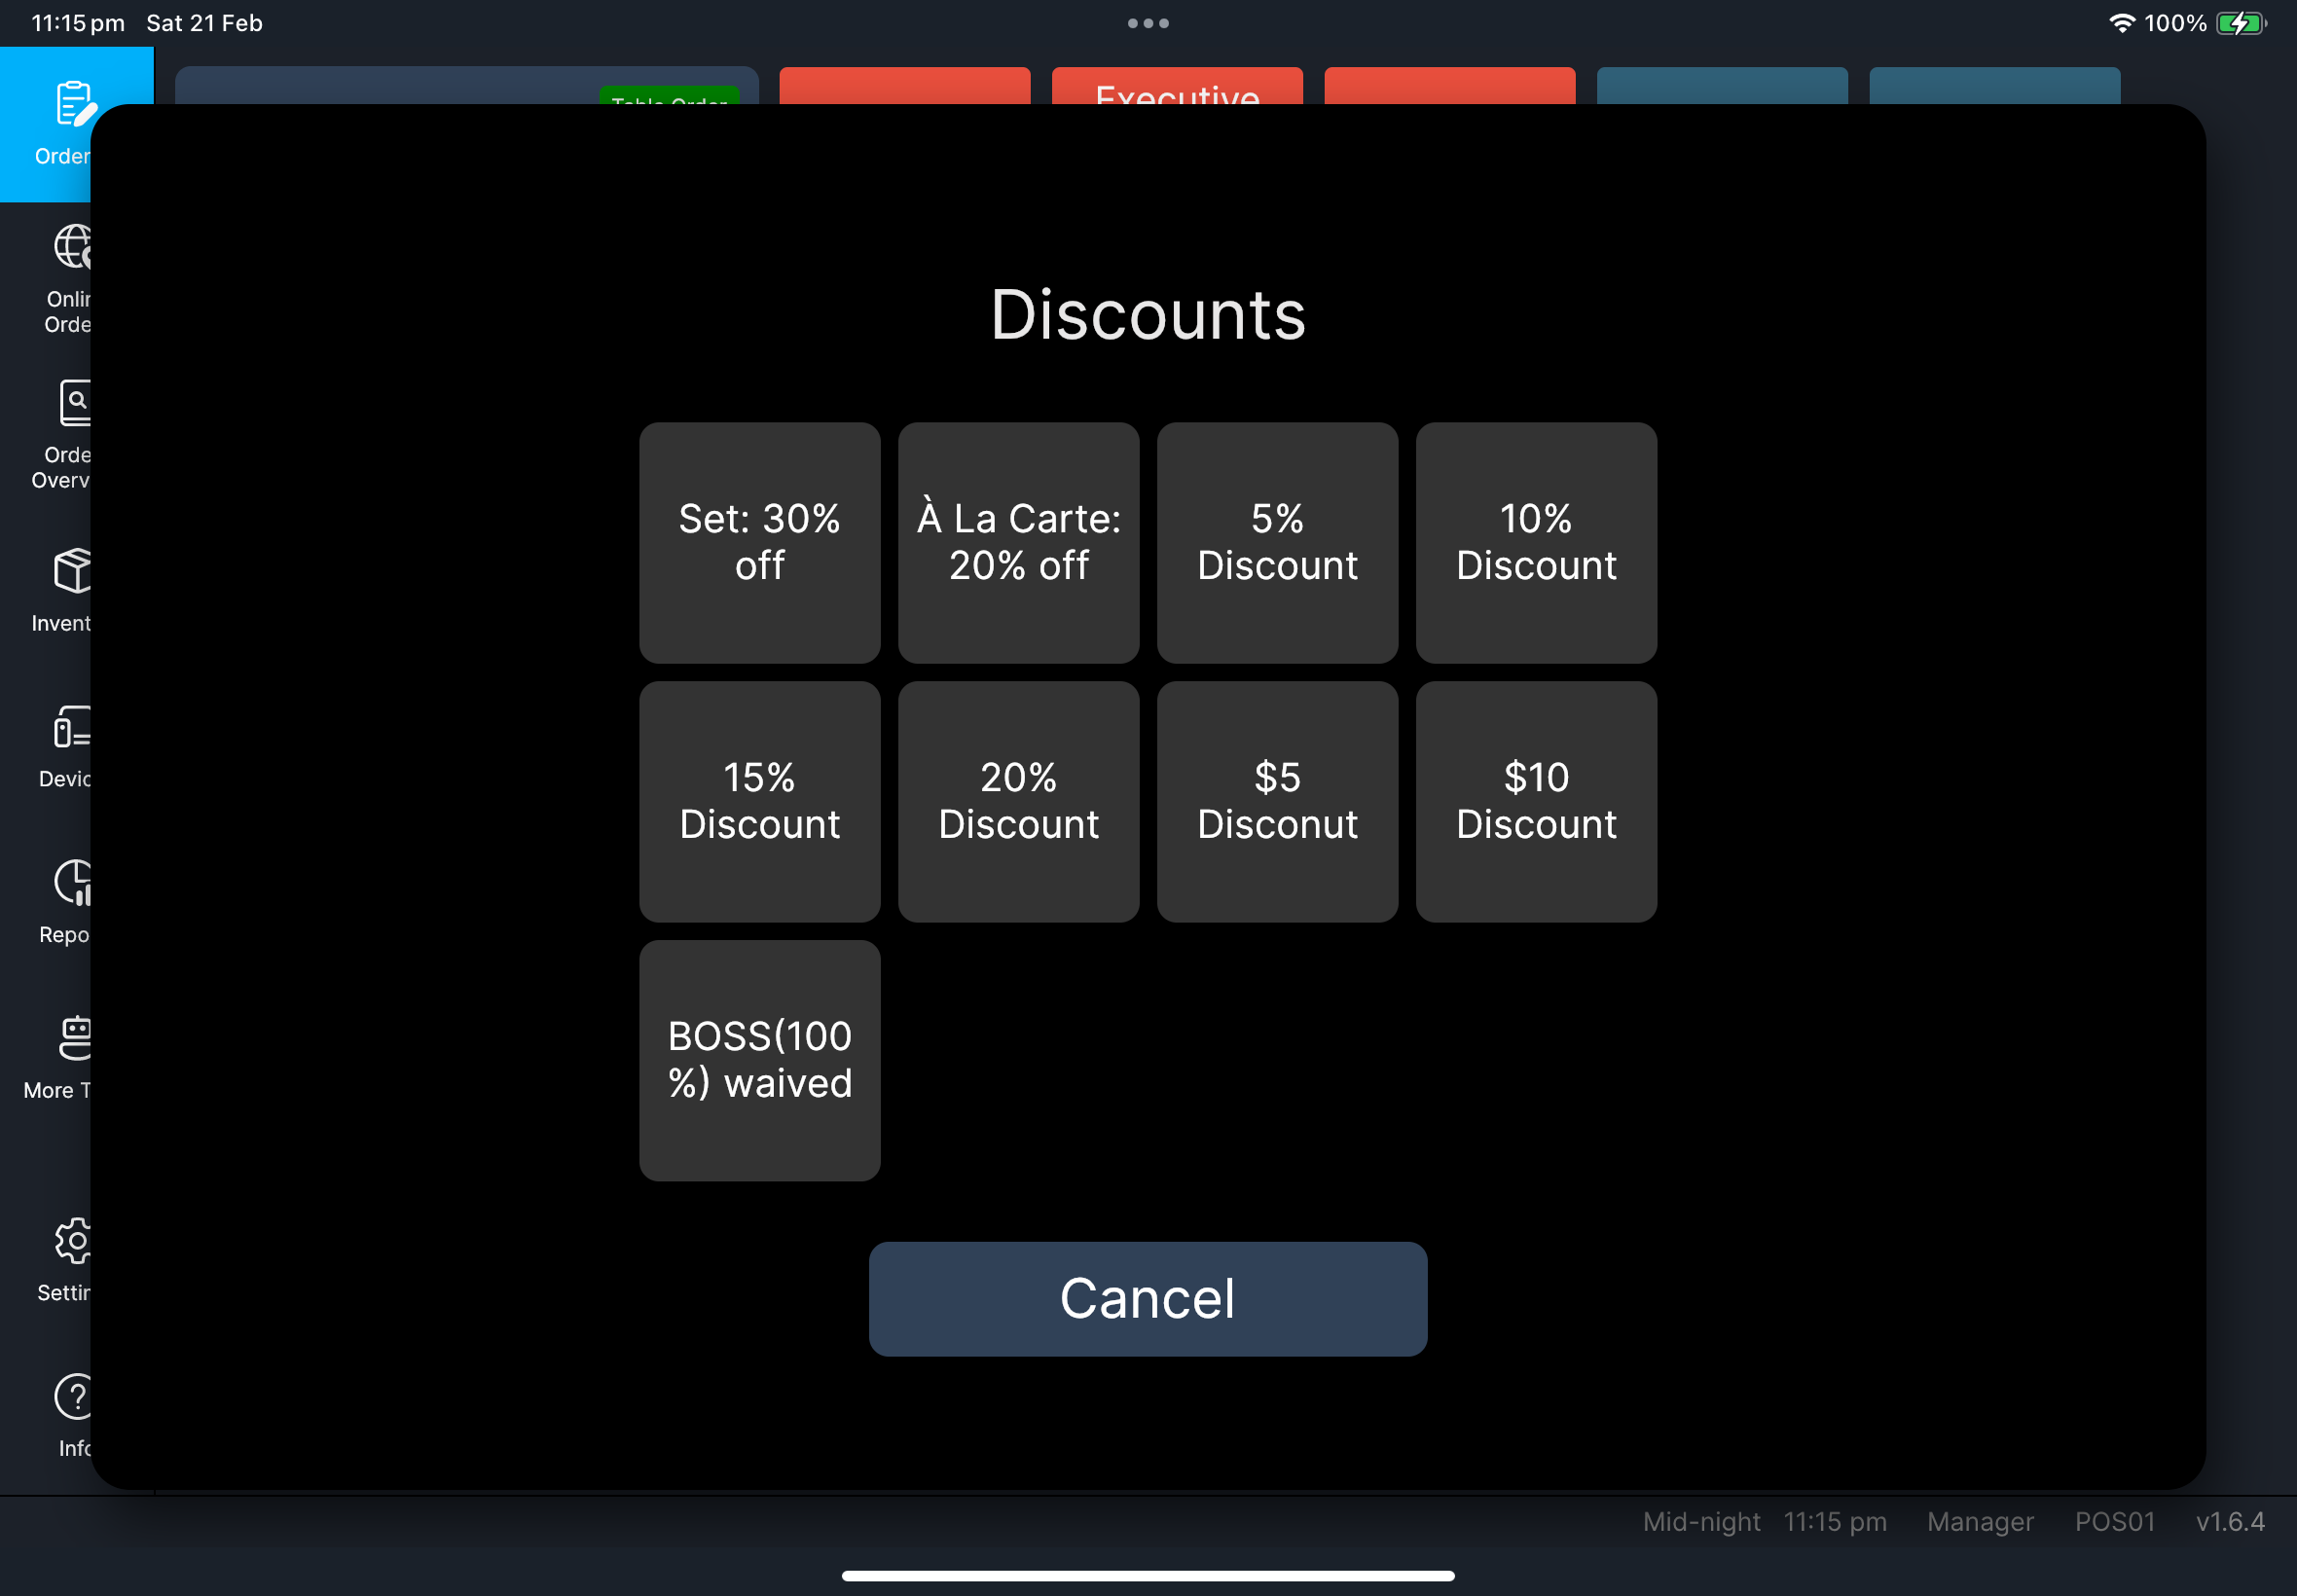
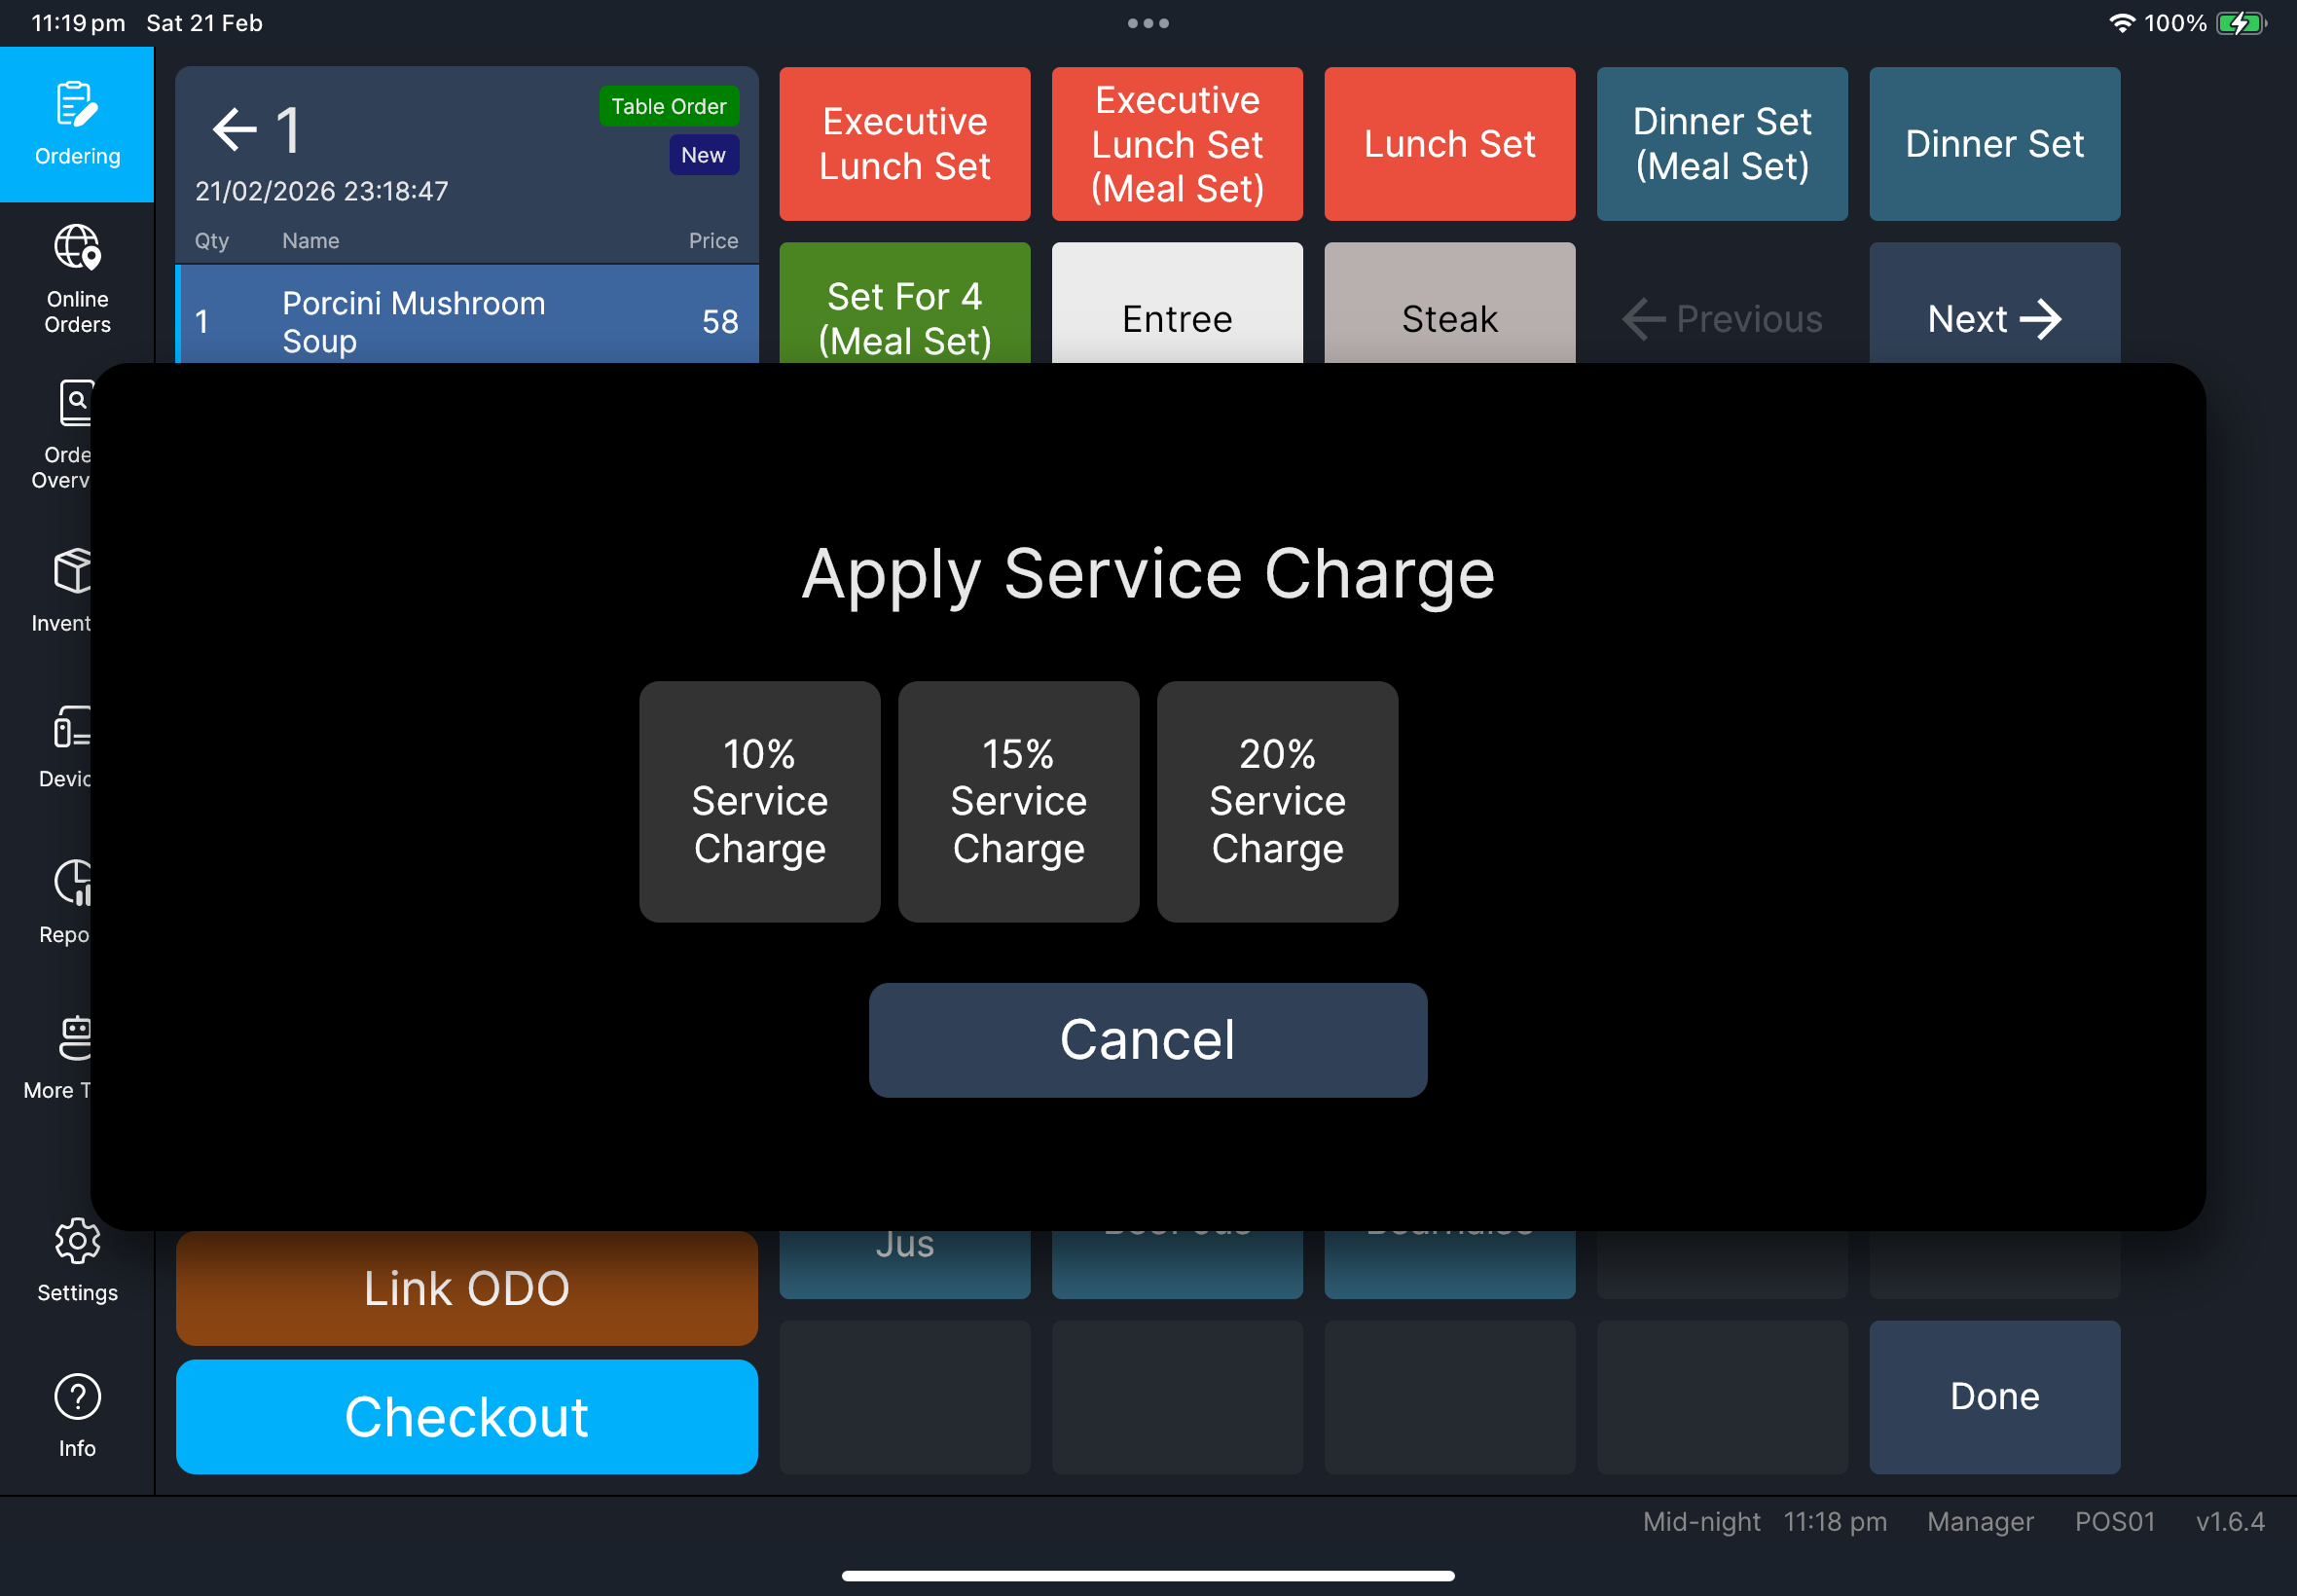
Function menu (when needed)
Tap the three-dot function button to open Select Function.
If you have many functions configured, Select Function may show Previous and Next tiles so you can move between pages.
Tap the three-dot function button to access:
Apply DiscountCancel DiscountApply Service ChargeCancel Service ChargeChange TableOrder ContactOrder RemarkTo Dine-In/To TakeawaySplit / Merge TxnVoid TxnPay In / Pay OutMember LoginOctopus Settlementwhen Octopus V3 is enabled and the reader is available
Use these detailed guides:
Apply Discount: Function guideApply Service Charge: Function guideChange Table: Function guideOrder Contact: Function guideTo Dine-In/To Takeaway: Function guideSplit / Merge Txn: Function guideMember Login: Function guidePay In / Pay Out: Function guideOctopus Settlement: Function guide

Add an order remark
- Tap the three-dot function button.
- In
Select Function, tapOrder Remark. - If
Order Remarkis on another page, tapPreviousorNext. - Enter the remark, then confirm.
- Check the remark appears under the order header.
- Tap the pencil icon beside the remark if you need to edit it again.
Needed file: client/cl-42-select-function-dialog-pagination.png
Needed file: client/cl-43-order-remark-display-edit.png
If something goes wrong
Send pending items first, then retry.
Use Change Table from function menu before checkout.
Select the item row and check whether modifiers can be adjusted manually. If the prompt still looks wrong, ask a manager/admin to review the item's Manage Relationships setup and Auto-show modifier groups on POS setting in HQ.
When to ask manager/admin
- Void/return requires manager policy approval
- Discount/service-charge options are missing but should be available
- Order behavior does not match store rules