Modifiers
Admins who define add-on, instruction, or option groups for items.
Before you start
- Confirm the correct brand.
- Make sure the modifier items already exist in Menu Items if the group needs item records.
- Decide whether the group is optional, single-choice, or multi-choice.
Open this page
Open Menu Management -> Modifiers.
What this page controls
Modifiers manages the groups of selectable options shown when an item needs custom choices or instructions.
Use this page to define:
- modifier group identity
- selection rules
- channel visibility
- linked modifier items and override prices
Main sections
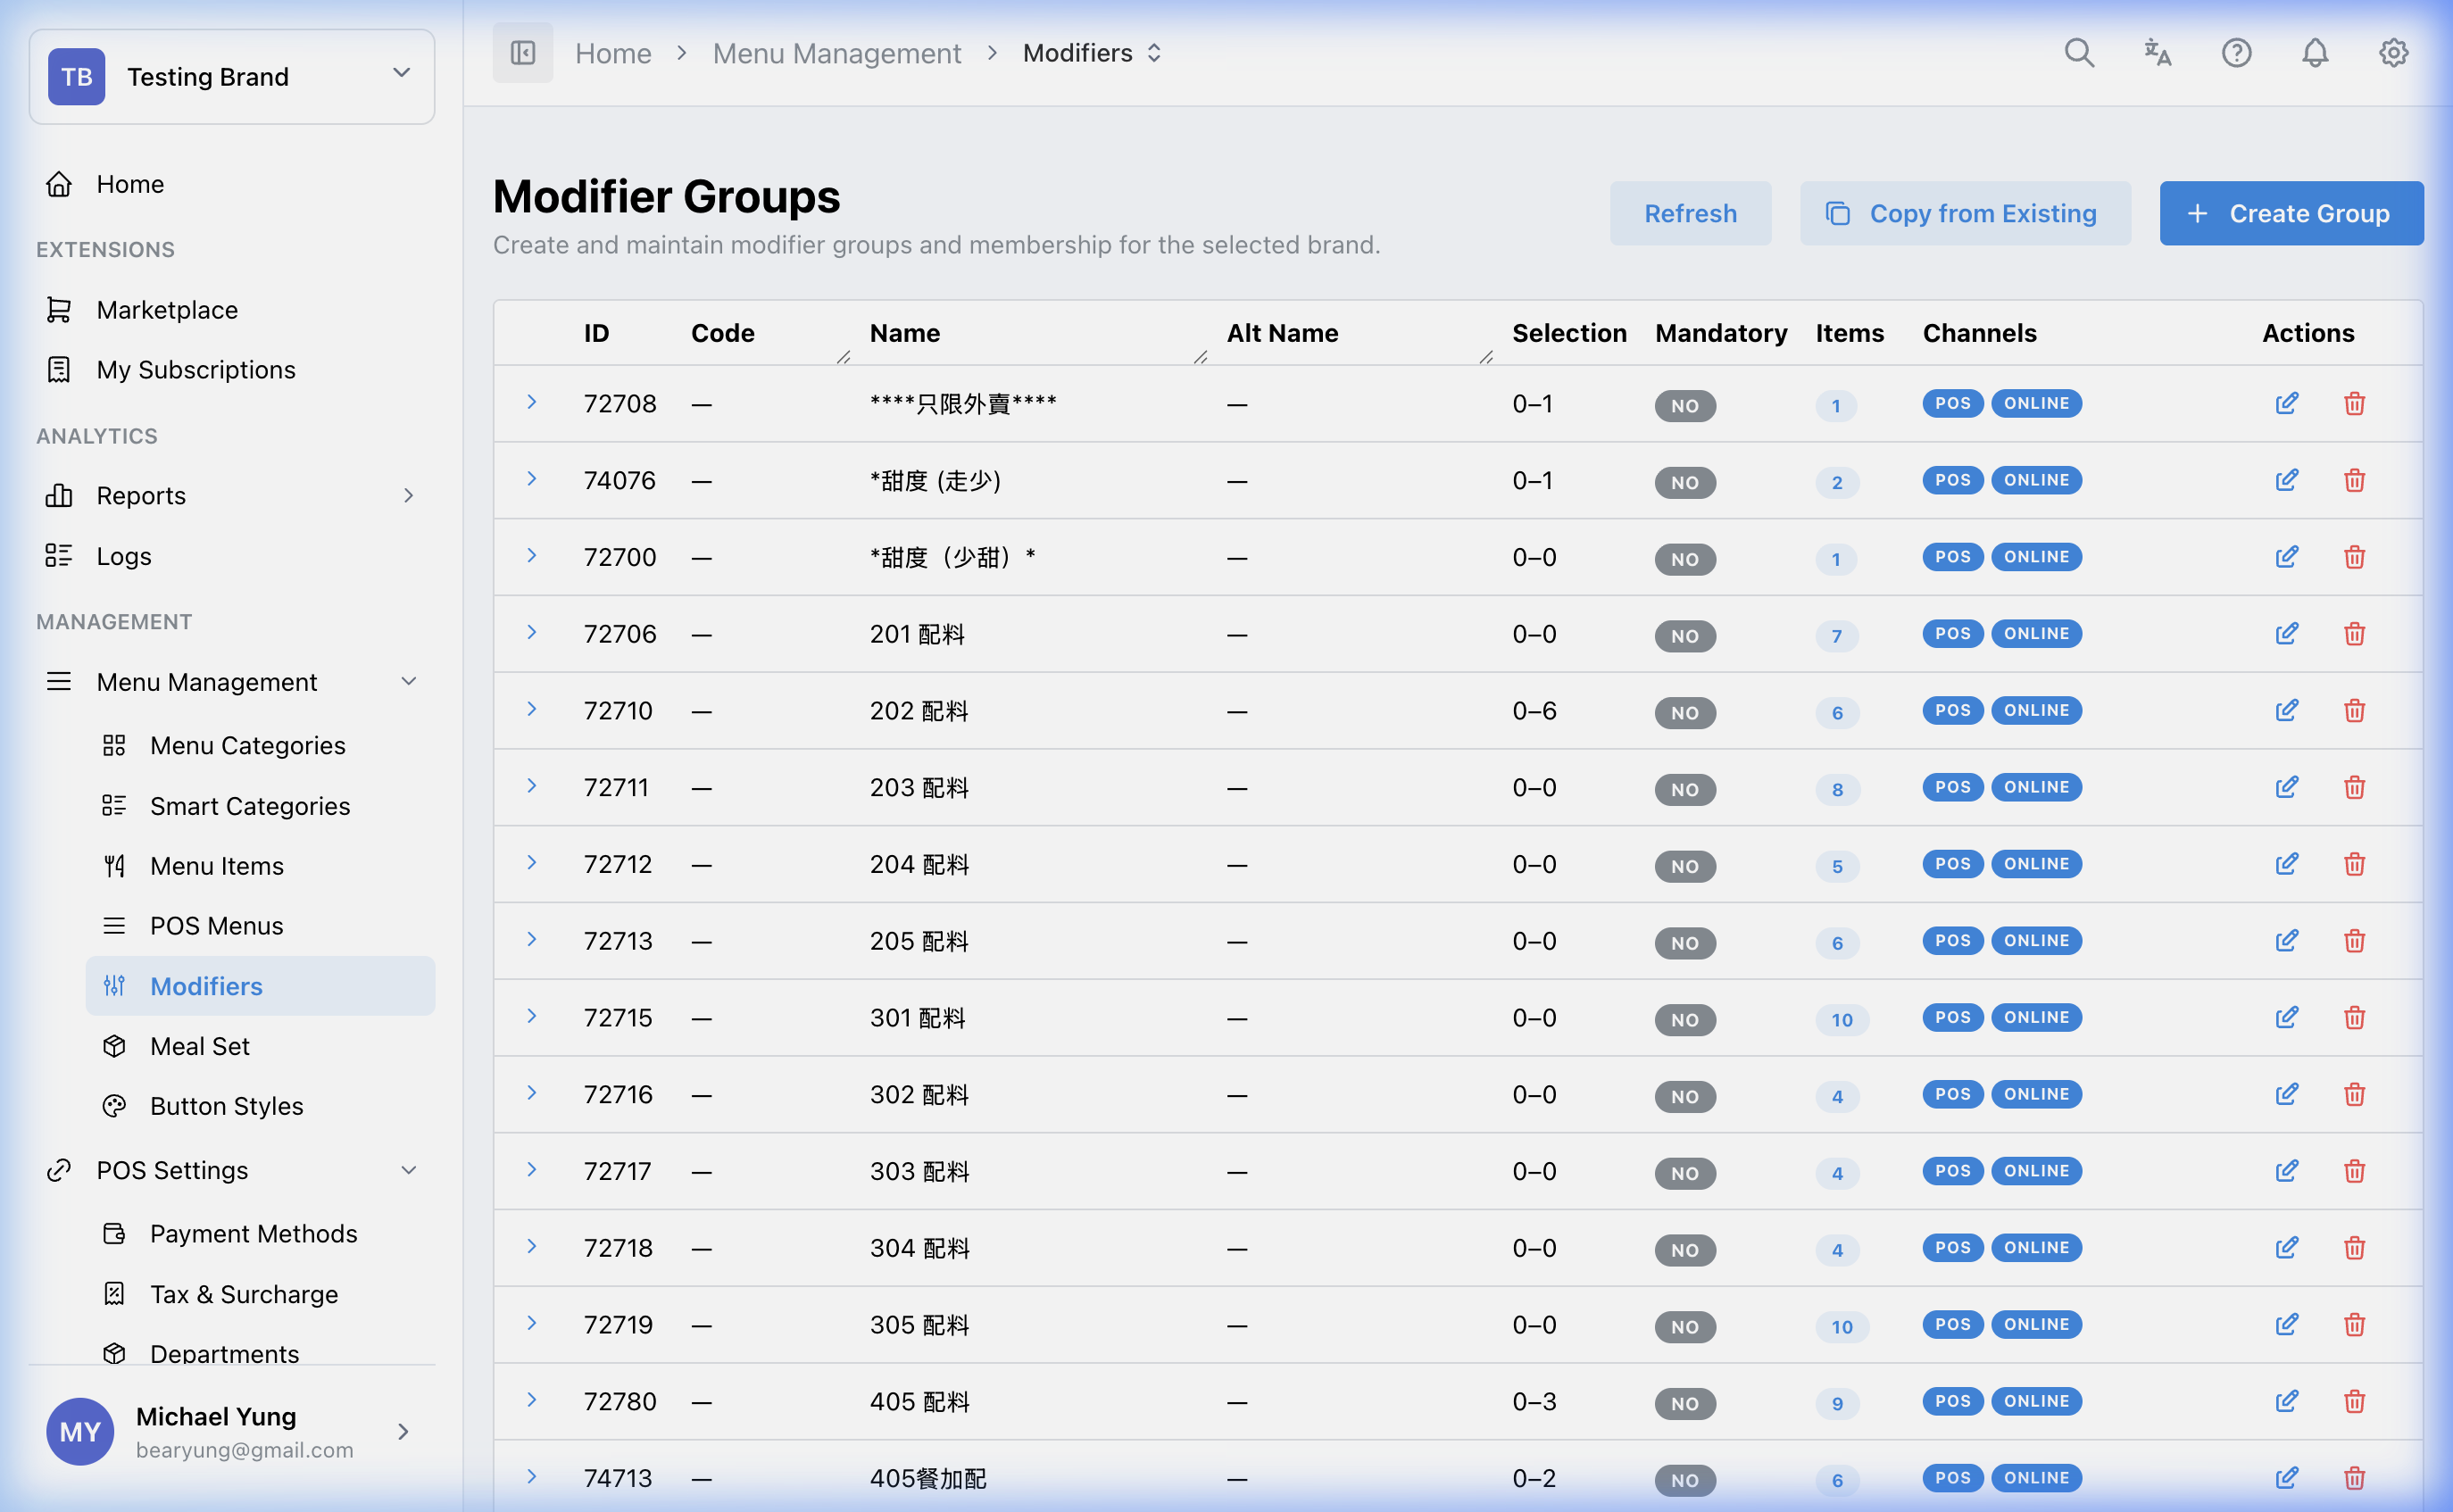
Modifier group rules
Key fields include:
NameandCodeMax SelectionMin Selection- channel controls
Min Selection helps determine whether a group is mandatory. Max Selection controls whether the group behaves like single choice or multiple choice.
Group contents
After the group is created, HQ focuses the new row and expands its detail area. Use Add Items to link existing modifier items, or use Create Item to create a new modifier item and add it to the group.
Copy a group
Use the row-level copy action when you need a similar modifier setup without rebuilding every option from scratch.
- The row action opens the copy modal for the selected group.
- The source group stays selected for you in the modal.
- There is no separate copy button in the page header.
- Turn on
Beast Modewhen you need to create more than one target group in the same save. - In
Beast Mode, you can setMax Selection,Min Selection,Display in POS, andDisplay in Online Orderingfor each copied row. - The copy action also brings over the linked modifier items and shop pricing details.
Restore a recently removed group
Use Show recently removed when a modifier group was removed by mistake.
- The toggle only shows groups removed in the last 24 hours. Groups removed longer ago are not included.
- Recently removed rows use a light gray background.
- A recently removed row only shows the restore action. The edit, copy, and delete actions are hidden.
- Select the restore icon to make the group active again.
- HQ blocks the restore if another active modifier group already has the same name. Rename or remove the active duplicate before you restore.
Steps
- Open
Menu Management->Modifiers. - Create a new modifier group or open an existing one.
- Enter the group
NameandCode. - Set
Min SelectionandMax Selection. - Choose the channels where the group should appear.
- Save the group.
- Check that the new group row is selected and expanded.
- Select
Add Itemsto link existing modifier items, or selectCreate Itemto create a new modifier item for this group. - Set any required override prices.
- Open the row action for the group you want to copy.
- Review the source group at the top of the copy modal.
- Turn on
Beast Modeif you need multiple target rows. - Enter the copied group details and shared display settings.
- Save the copy.
- If you removed a group by mistake, turn on
Show recently removed. - Find the light gray row and select the restore icon.
- If HQ says a group with the same name already exists, review the active groups before trying again.
What changes after you save
These changes affect how items present selectable options or required choices on the POS and, where enabled, in other channels. The row-level copy workflow also creates new groups with the linked modifier items and shop pricing details already copied over.
How to check your change
- Reopen the group and confirm the rules and items.
- Verify the modifier items are attached in the correct order.
- Test the parent item flow where the modifier group should appear.
If something goes wrong
- Confirm the modifier items exist and are attached to the group.
- Check whether the selection rule is too strict or too loose.
- If the group does not appear, review the parent item attachment and channel settings.
- If restore is blocked, check whether another active modifier group is using the same name.
When to ask owner/admin
- The modifier logic affects a high-volume live menu and cannot be tested safely.
- You are unsure whether the change belongs in a modifier group or a meal set.