Settings
Managers/admin-level users maintaining terminal configuration.
Before you start
- You are signed in with settings access rights
- You understand store policy for configuration changes
- Your POS user group includes
POS settings admin
What this screen is for
Use Settings to maintain terminal behavior, service mode, language/POS code, day-end clearing controls, printing, integrations, and operation rules.
Language configuration
Use the language section in General to manage:
- Default UI language for this terminal
- Item name display source per language (
MainorAlt) - Login-screen quick-switch availability per language
Main / AltMain and Alt are two item-name sources from your menu setup.
If one source is blank for an item, POS falls back to the other available name.
Main sections
- General
- Operation
- System
- Printing
- Third Party Platform + ODO
- Report
Includes language configuration (Item Mapping, Login Quick Switch), required codes (POS Code, Cash Register Code), and Clearing controls such as Local Transaction Retention (Days).
Includes Terminal mode plus order/payment behavior toggles and service workflow controls.
Includes Number controls such as Rounding Method, Decimal Places, and Round For Cash Only.
Includes Mapping, Setting, and Template tabs for printer routing and print output behavior.
Includes enabled third-party integrations and ODO controls such as Channel Mapping.
Includes report-related output settings such as Print Qty and Daily Report Sections.
Common language tasks
- Set default UI language
- Set item name mapping
- Configure login quick switch
- Tap
Settings->General. - In language configuration, select the language row you want as default.
- Confirm UI text updates to the selected language.
- Tap
Save.
- Tap
Settings->General. - In the target language row, set
Item MappingtoMainorAlt. - Tap
Save. - Open
Orderingand confirm item names display as expected.
- Tap
Settings->General. - Turn
Login Quick Switchon for the languages staff can switch on login screen. - Tap
Save. - Return to login screen and confirm the language quick-switch button appears.
Switch terminal mode
- Restaurant
- Quick Order
- Tap
Settings->Operation. - In
Terminal, setModetoRestaurant. - Tap
Settings->General. - Turn
Enable Dine In Auto Open Orderoff. - Turn
Enable Takeaway Auto Open Orderoff. - Turn
Enable Floor Plan Modeon if your store uses floor-plan table view. - Tap
Save. - Return to
Orderingand confirm staff must choose a table or takeaway order before adding items.
- Tap
Settings->Operation. - In
Terminal, setModetoQuick Order. - Tap
Settings->General. - Turn
Enable Dine In Auto Open Orderon. - Turn
Enable Takeaway Auto Open Orderon. - Turn
Enable Default Takeaway Modeon if takeaway should open first. Leave it off if dine-in should open first. - Turn
Enable Dine In Auto Assign Table CodeandEnable Takeaway Auto Assign Table Codeon if you want POS to rotate counters automatically for new quick orders. - Tap
Save. - Return to
Orderingand confirm POS opens a new order directly instead of asking staff to pick a table first.
Enable Dine In Auto Assign Table Code and Enable Takeaway Auto Assign Table Code only appear after the matching auto-open setting is turned on.
Reset Table Counters in More Tools is used with Quick Order mode when your store uses the rotating quick-order counters.
Common rounding tasks
- Tap
Settings->System. - In
Number, selectRounding Method(None,Round Up,Round Down, orRound to Nearest 5 cents). - Set
Decimal Placeswhen that field is shown. - Turn
Round For Cash Onlyon when rounding should apply only to cash payments. - Tap
Save. - Open
Checkoutand confirm totals behave as expected for cash and non-cash methods.
If Rounding Method is Round to Nearest 5 cents, Decimal Places is hidden.
Restore settings from backup
- Tap
Settings. - Tap
Restorein the bottom action bar. - Select the backup entry you want to apply.
- Confirm restore completes.
- Review key settings and tap
Save.
Restore now covers more configuration areas in current builds, so verify critical items after restore:
- Printer routing and print settings
- Customer display and terminal behavior settings
- Integration-related settings
Common print language override task
- Tap
Settings->Printing. - Open
Template. - Select the target print template.
- Set
Languageto the required print language (or keepFollow System). - Tap
Save. - Print a test receipt/slip and confirm output language.
Common print template font task
- Tap
Settings->Printing. - Open
Template. - Select the target print template.
- Adjust the font size rows for that template.
- Use
Previewto confirm the output is readable. - Tap
Save. - Print a test receipt/slip and confirm the printed output follows the saved font settings.
Current template font profiles include Receipt / Checklist / Invoice, Kitchen Slip, Label, Pickup Slip, Department Slip, Item Order Slip, ODO QR Code Slip, Octopus Add Value Slip, and Pay In/Out Slip.
Common label text fitting task
- Tap
Settings->Printing. - Open
Template. - Set
TemplatetoLabel. - Turn
Enable adaptive text sizeon if long item or modifier names should shrink to fit the label width. - Leave
Enable adaptive text sizeoff if your store wants label text to keep the configured body font size. - Tap
Save. - Print a label with a long item name and confirm the text is still readable.
Common automatic reprint label task
- Tap
Settings->Printing. - Open
Template. - Select the print template that needs recovery labels, such as
Kitchen Slip,Department Slip, orItem Order Slip. - Turn
Show AUTO REPRINT label on automatic retrieson when kitchen or counter staff need to identify output that was printed again by the automatic spooler retry. - Leave it off for customer-facing output where your store does not want the recovery label printed.
- Tap
Save. - If you are testing a printer recovery case, confirm automatic retry output shows the expected
AUTO REPRINTlabel.
Common receipt auto print task
- Tap
Settings->Printing. - Open
Setting. - In
Receipt, turnAuto Print Receipton if receipts should print automatically after successful checkout. Turn it off if staff should decide manually when to print. - Tap
Save. - Complete a normal checkout and confirm receipt printing matches your store policy.
Auto Print Receipt controls receipt printing only. If the payment method is configured to open the cash drawer, the drawer still opens after checkout when Auto Print Receipt is off.
Common takeaway contact print task
- Tap
Settings->Printing. - Open
Setting. - In
Receipt, turnShow Order Contact On Receipton or off. - In
Kitchen Slip, turnShow Order Contact On Kitchen Outputon or off. - Tap
Save. - Print a takeaway receipt or kitchen slip and confirm the contact details show only where your store expects them.
If you need to adjust receipt font size for this section, open Template and review the Customer Contact row in the receipt font settings.
Common day-end report section task
- Tap
Settings->Report. - Set
Print Qtyif your store needs more than one printed copy. - In
Daily Report Sections, turnSummary,Cash Movement,Sales Breakdown, andPayment Breakdownon or off based on what managers should print at close. - Turn
Show advanced sectionson if you need to control parts inside those sections. - In
Advanced Sections, turn specific parts such asOpen Amount,Pay In,Pay Out,Cash Difference,Close Amount,Audit,Cashier Summary,Department Sales, orPayment Tipson or off. - Tap
Save. - Run a day-end report and confirm only the required sections are printed.
Advanced section toggles only apply when the matching parent section stays on.
Common local transaction retention task
- Tap
Settings->General. - Scroll to
Clearing. - In
Local Transaction Retention (Days), enter how many days of closed workday transaction history this device should keep locally. - Tap
Save. - After later day-end processing or scheduled cleanup, confirm recent transaction history still matches your store's expected local lookup window.
Only older closed workdays are removed from this device when they are outside the retention window. Open workdays and unclosed orders are not removed.
If you increase Local Transaction Retention (Days) later, POS does not restore local history that was already removed. Full history remains available in the cloud according to your company policy.
Integration and channel visibility behavior
- In
Third Party Platform, only enabled integrations are shown. - In
ODO->Channel Mapping, only mapped channels are shown. - If the terminal is offline, channel mapping shows an online-only hint and mapping rows are unavailable.
Steps
- Tap
Settings. - Select the section on left panel.
- Update required fields/toggles.
- Tap
Save. - Verify changes are applied.
What you should see
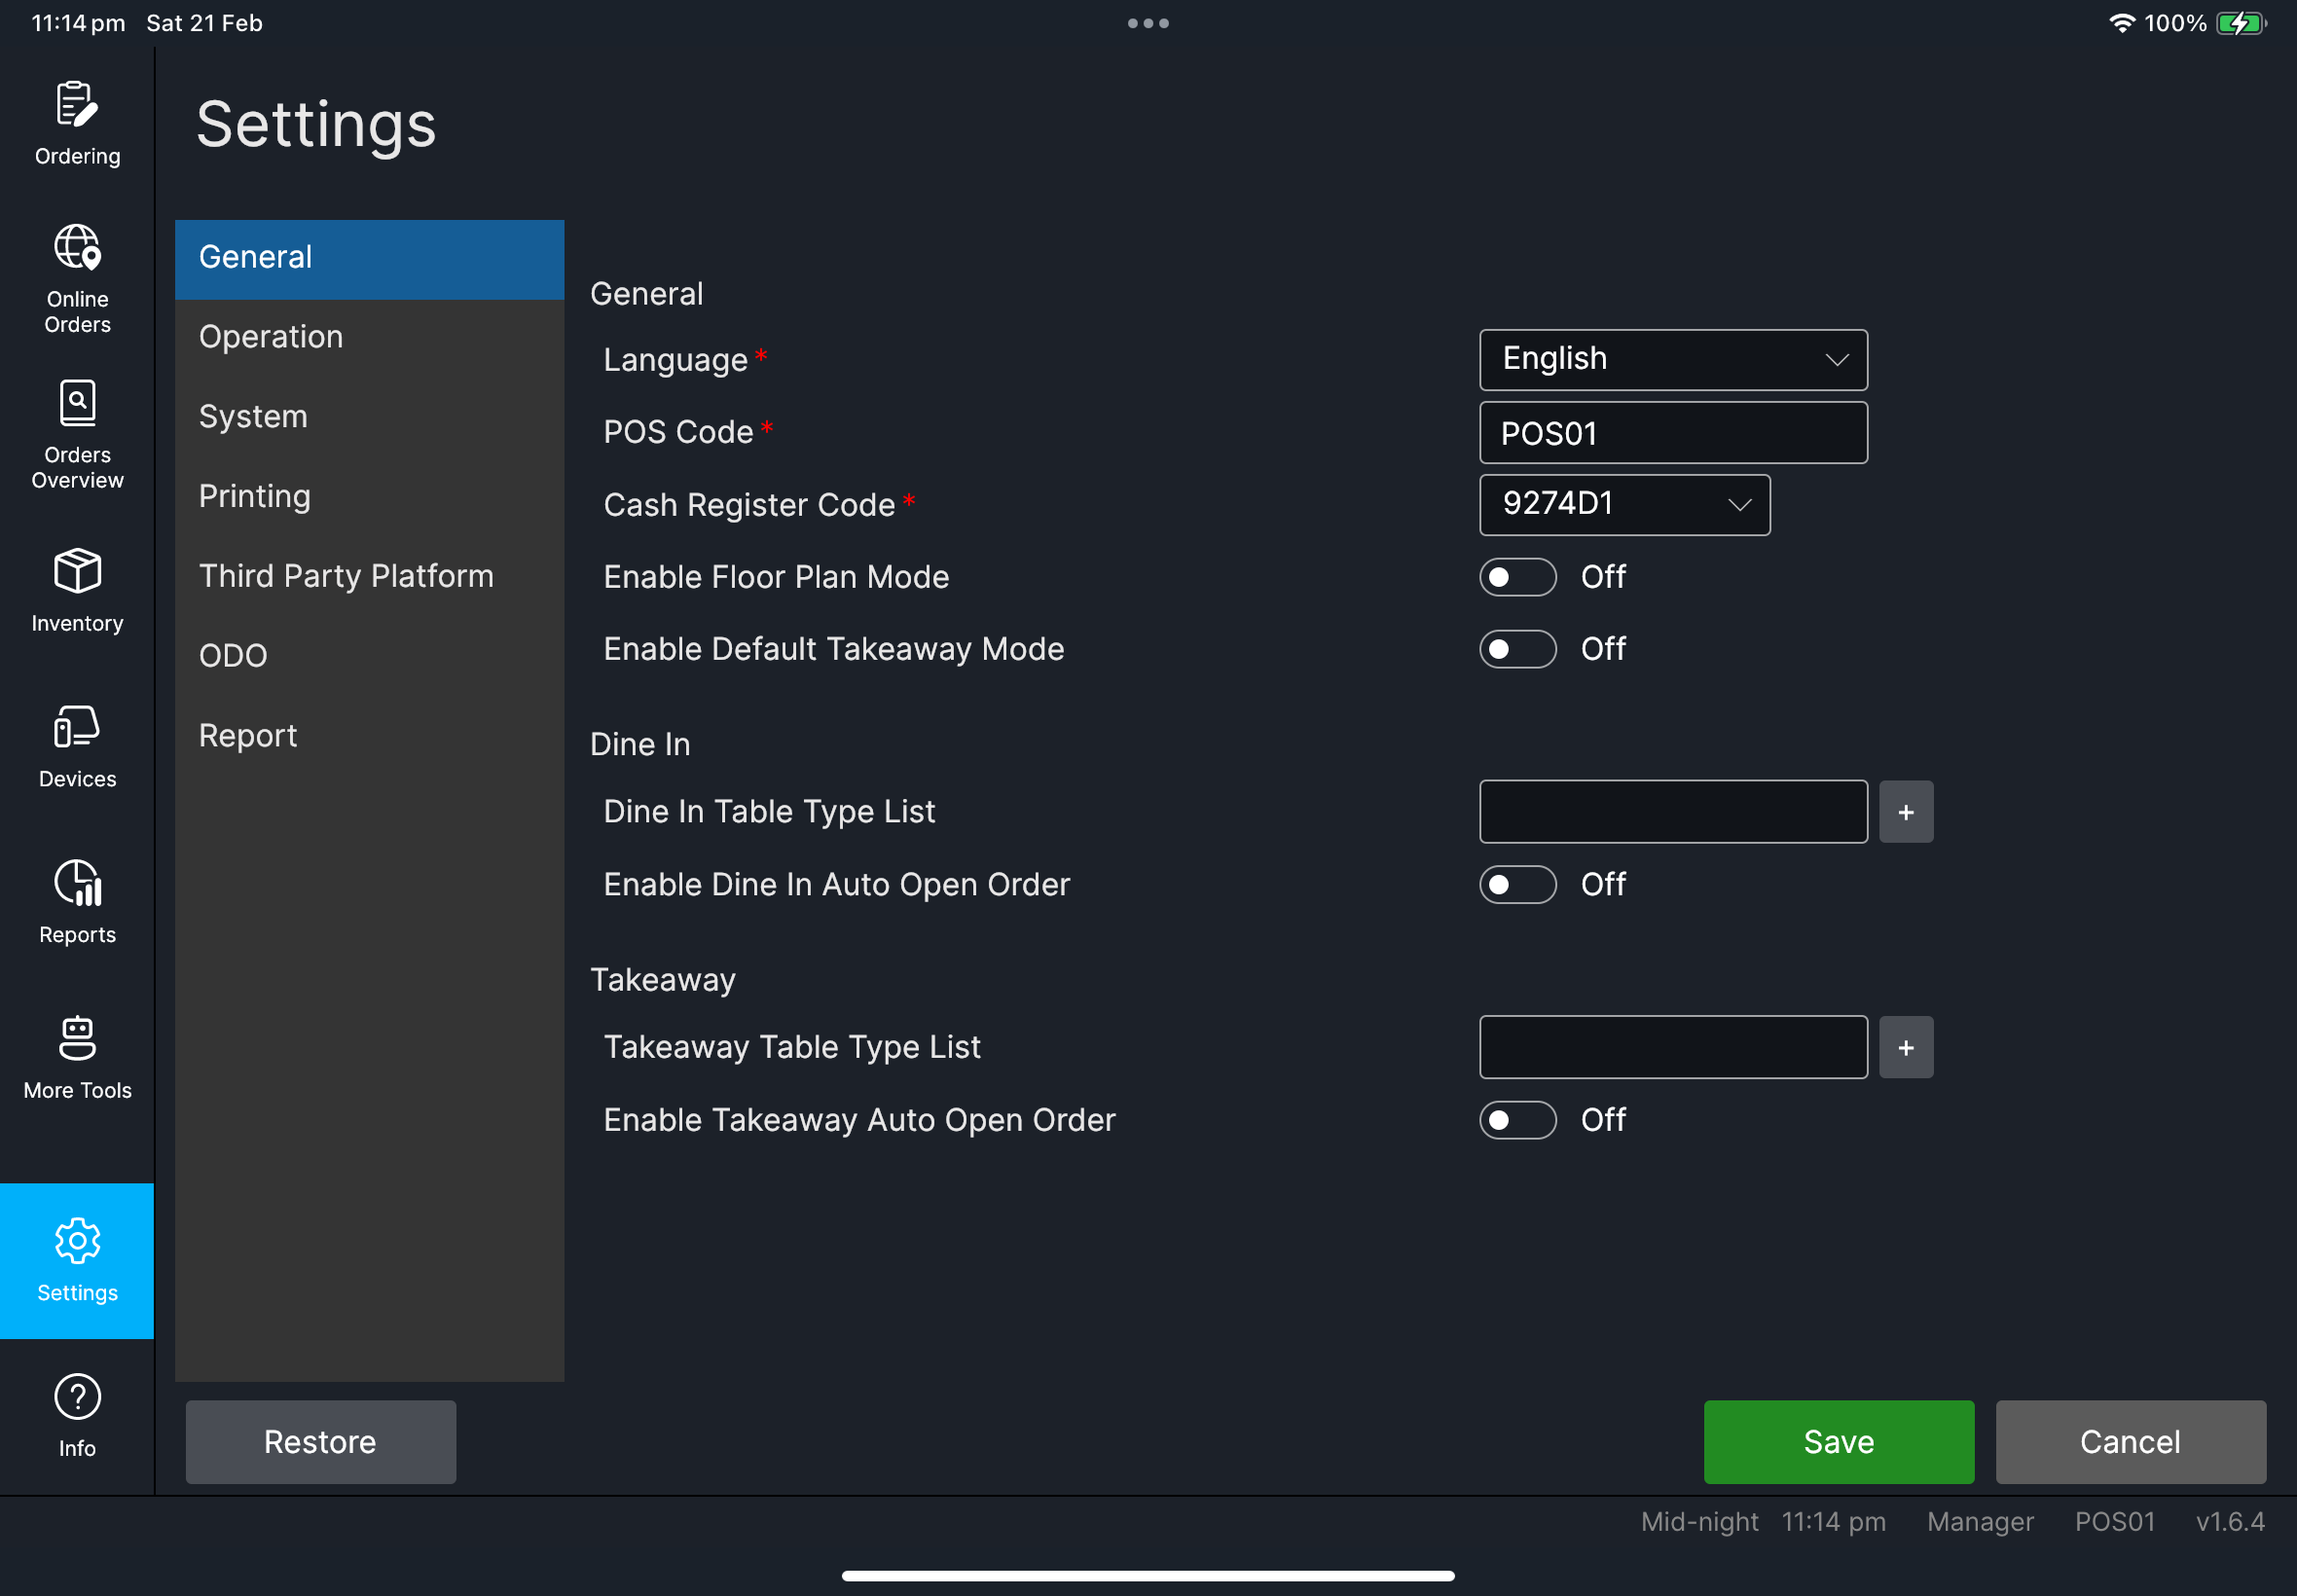
Language Configurationgrid withItem MappingandLogin Quick SwitchOperation->TerminalincludesModewithRestaurantandQuick OrderGeneralincludes the auto-open and auto-assign settings that control table-first vs direct-order flowSystem->NumberwithRounding Method,Decimal Places(when shown), andRound For Cash OnlyPrintingwithMapping,Setting, andTemplatetabsPrinting->SettingincludesAuto Print ReceiptPrinting->SettingincludesShow Order Contact On ReceiptandShow Order Contact On Kitchen OutputPrinting->Templatereceipt font settings includeCustomer ContactPrinting->Templateincludes font profiles forOctopus Add Value SlipandPay In/Out SlipPrinting->Templatelabel settings includeEnable adaptive text sizePrinting->TemplateincludesShow AUTO REPRINT label on automatic retriesGeneral->ClearingincludesLocal Transaction Retention (Days)and the warning text about older closed workdays being removed from this deviceReportincludesPrint Qty,Daily Report Sections, andShow advanced sectionsRestoreaction at the bottom of settings
Needed file: client/cl-40-settings-language-configuration-grid.png
Needed file: client/cl-45-settings-print-order-contact-toggles.png
Needed file: client/cl-53-settings-template-font-profiles.png
Needed files: client/cl-46-settings-operation-terminal-mode.png, client/cl-47-settings-general-order-mode-toggles.png
Needed files: client/cl-48-settings-print-auto-print-receipt.png, client/cl-49-settings-report-day-end-sections.png
Needed file: client/cl-51-settings-template-label-adaptive-text-size.png
Needed file: client/cl-50-settings-general-clearing-local-transaction-retention.png
If something goes wrong
Check required fields (POS Code, required codes) and retry.
Permission deniedYour POS user group does not allow settings changes. Ask a manager/admin to update the group in HQ POS Users or have an authorized person make the change.
When to ask manager/admin
- You do not have permission to change settings
- Change may affect all terminals/store behavior